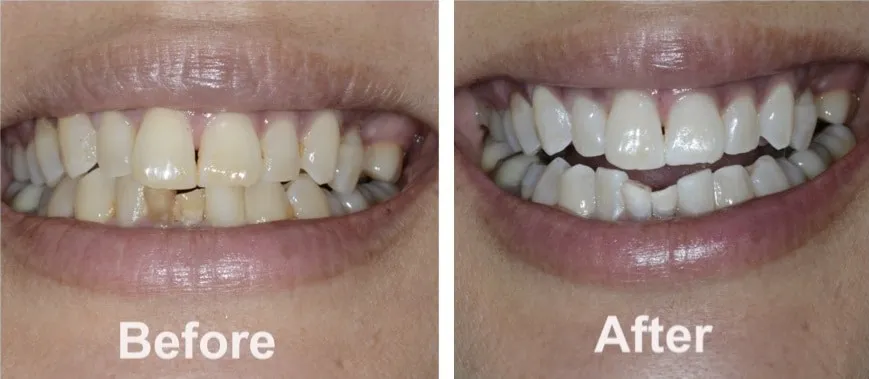
Understanding Zoom Teeth Whitening
Achieving a brighter, whiter smile has become a priority for many, and Zoom teeth whitening is a popular option. While professional Zoom whitening is done in a dentist’s office, the desire to replicate those results at home is strong. This article delves into the world of at-home teeth whitening, specifically focusing on methods that can help you achieve results comparable to professional treatments. We’ll explore various techniques, from over-the-counter products to natural remedies, providing you with a comprehensive guide to brighten your smile from the comfort of your home. Understanding the nuances of these methods, their effectiveness, and safety is crucial to make informed choices and achieve the desired outcome.
What is Zoom Teeth Whitening
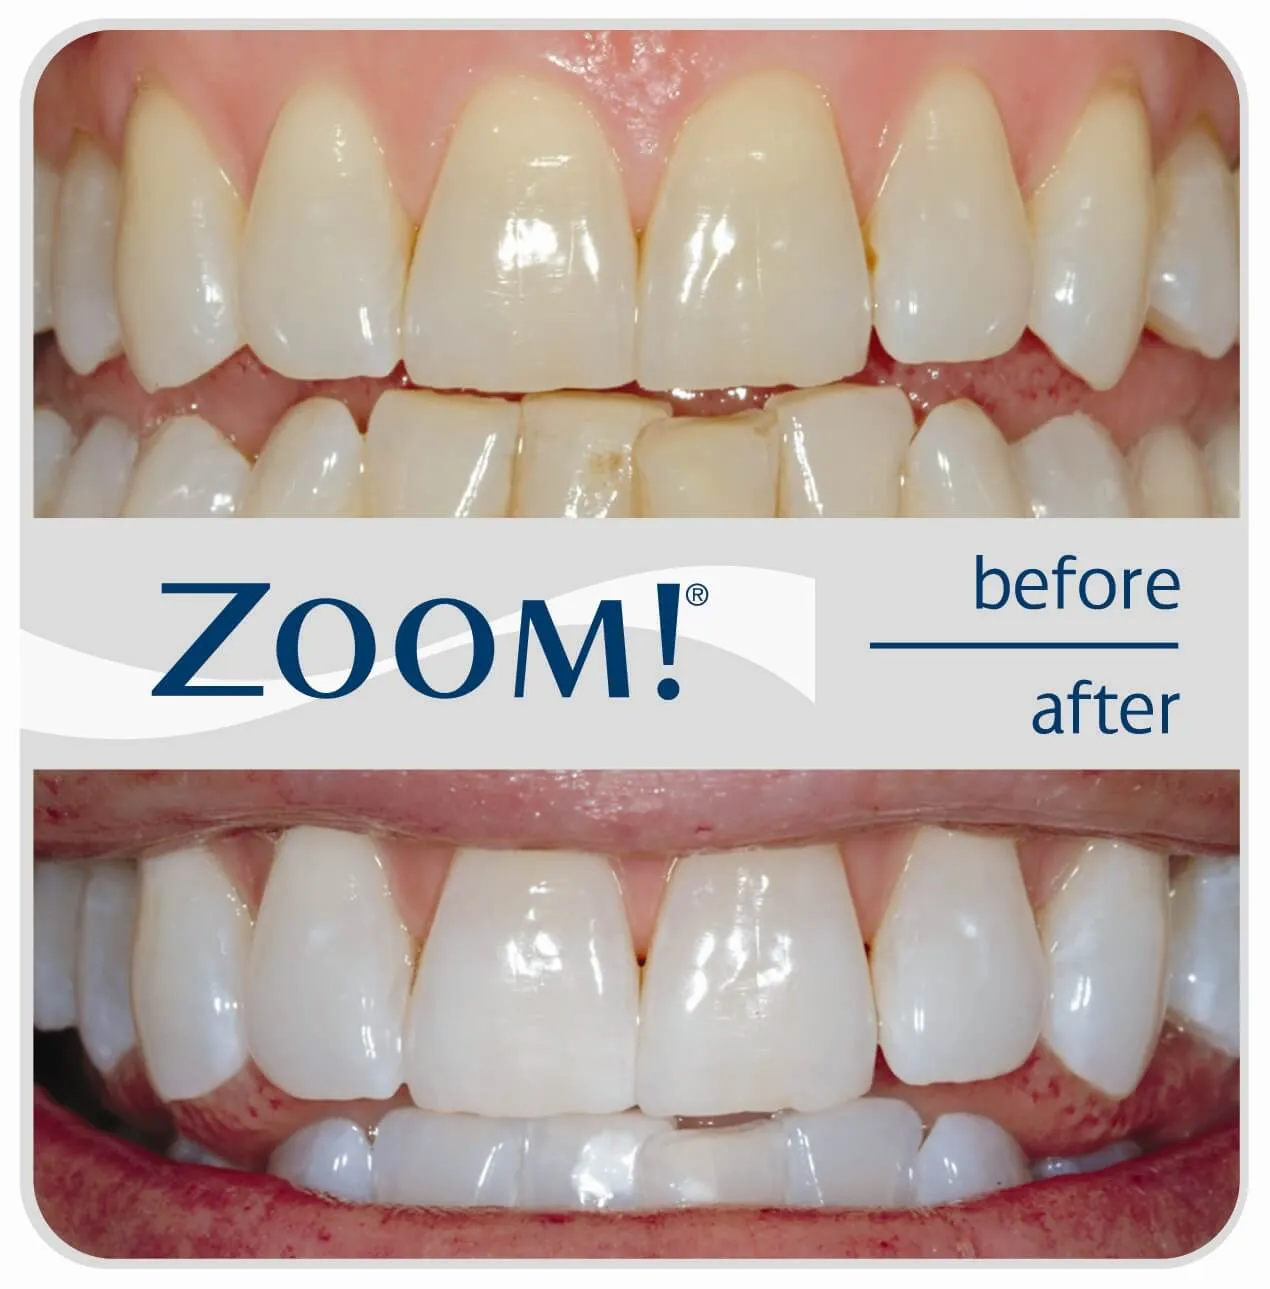
Zoom teeth whitening, in its professional form, is a powerful in-office procedure that uses a high-concentration hydrogen peroxide whitening gel activated by a special light. This combination accelerates the bleaching process, delivering dramatic results in a single session. The light helps to break down the stains on your teeth, revealing a significantly whiter smile. However, this professional treatment is typically more expensive and requires a visit to the dentist. The ‘Zoom’ brand has become synonymous with this type of rapid, effective whitening. At-home methods aim to mimic the results but with varying levels of potency and application methods. These at-home options offer convenience and cost-effectiveness, making them a popular choice for those seeking a brighter smile.
How Does Zoom Teeth Whitening Work
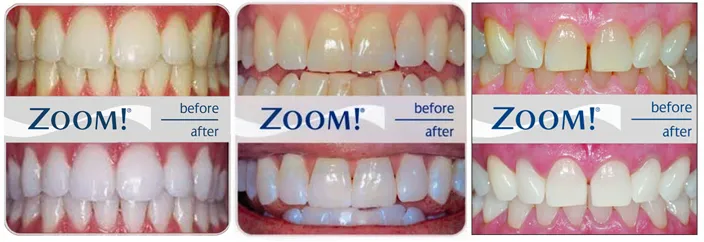
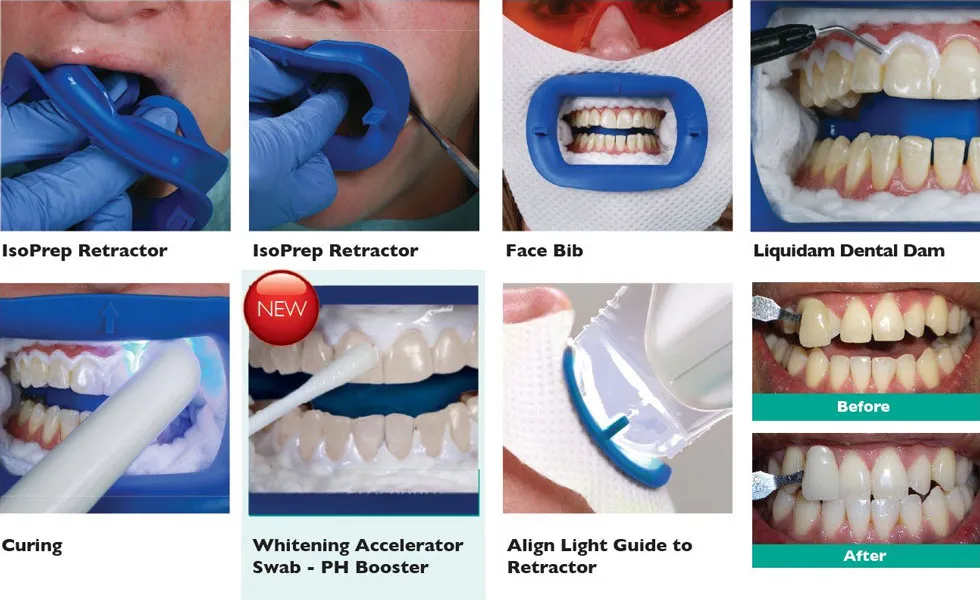
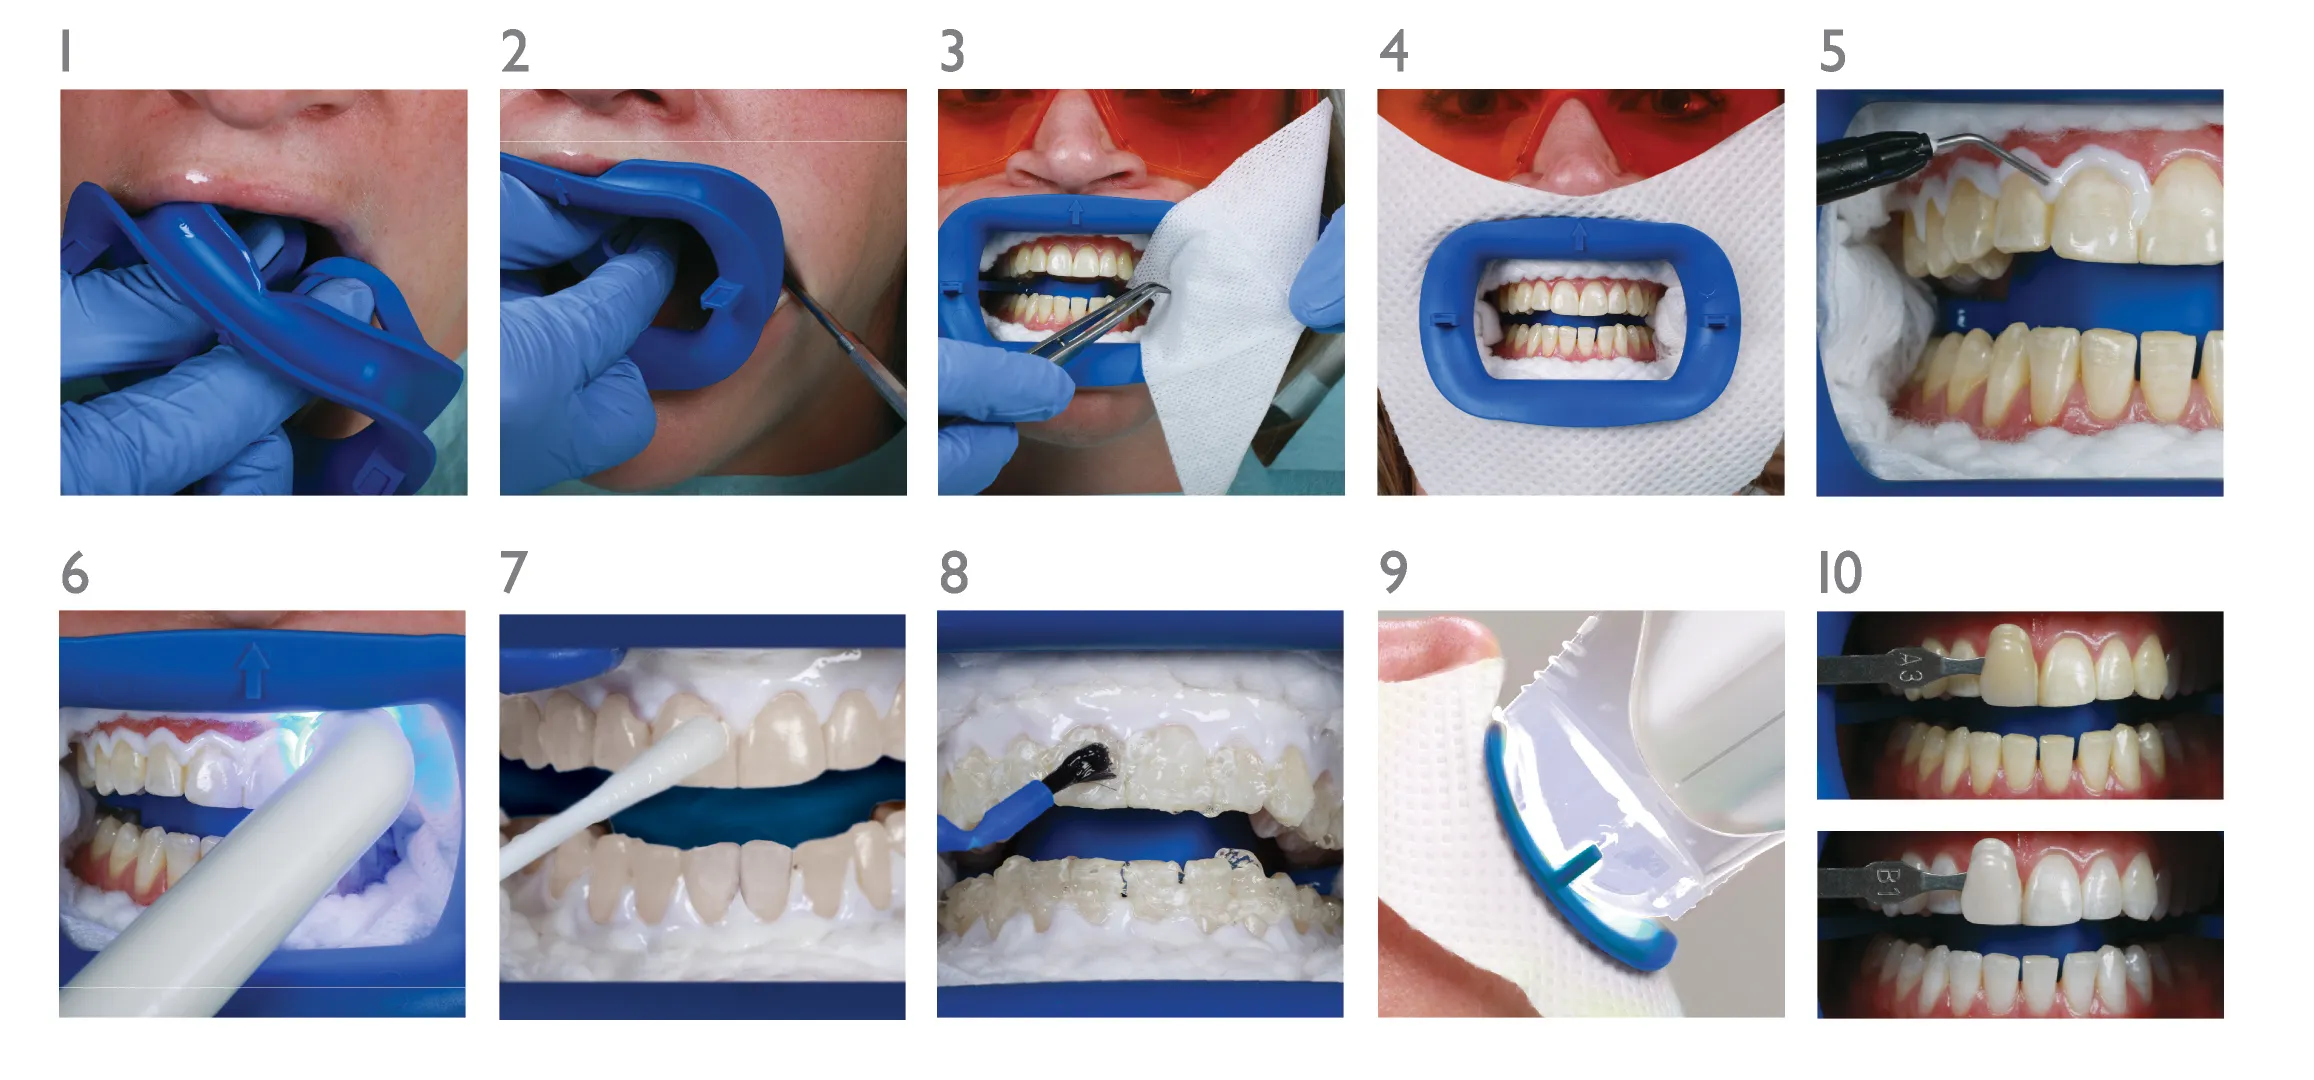
In professional Zoom whitening, the process begins with the dentist applying a protective barrier to your gums and lips to prevent irritation. Then, the whitening gel, which contains a high concentration of hydrogen peroxide, is applied to the teeth. A special Zoom light is then directed onto the teeth, activating the whitening agent. This light helps to break down the stains on the enamel, resulting in a noticeably whiter smile. The process is usually repeated in 15-minute intervals for a total treatment time of about an hour. The results are often immediate and dramatic, providing a significant boost to the patient’s confidence. The at-home methods try to achieve similar results, but typically involve lower concentrations of whitening agents and different application methods, such as trays or strips.
Zoom Teeth Whitening at Home: The Top 5 Methods
The quest for a brighter smile doesn’t always require a trip to the dentist. There are several effective at-home methods that can help you achieve impressive results. These methods range from over-the-counter products to natural remedies, each offering a unique approach to teeth whitening. It is important to remember that at-home methods often contain lower concentrations of whitening agents than professional treatments, and the results may take longer to achieve. Consistency and adherence to the instructions are key to maximizing effectiveness and minimizing potential risks. Here are five of the most popular and effective methods for zoom teeth whitening at home:
Method 1 Over-the-Counter Whitening Strips
Whitening strips are one of the most accessible and convenient at-home teeth whitening solutions. They are thin, flexible strips coated with a hydrogen peroxide or carbamide peroxide whitening agent. These strips are designed to be applied directly to the teeth, adhering to the surface for a specified amount of time, typically 30 minutes to an hour. Over-the-counter whitening strips are readily available in most drugstores and supermarkets, making them an easy and affordable option for brightening your smile. They are designed to be user-friendly, but it is essential to follow the instructions carefully to ensure effective whitening and minimize any potential sensitivity or irritation. The ease of use makes them a popular choice for people looking for a quick and straightforward whitening solution.
Benefits of Whitening Strips
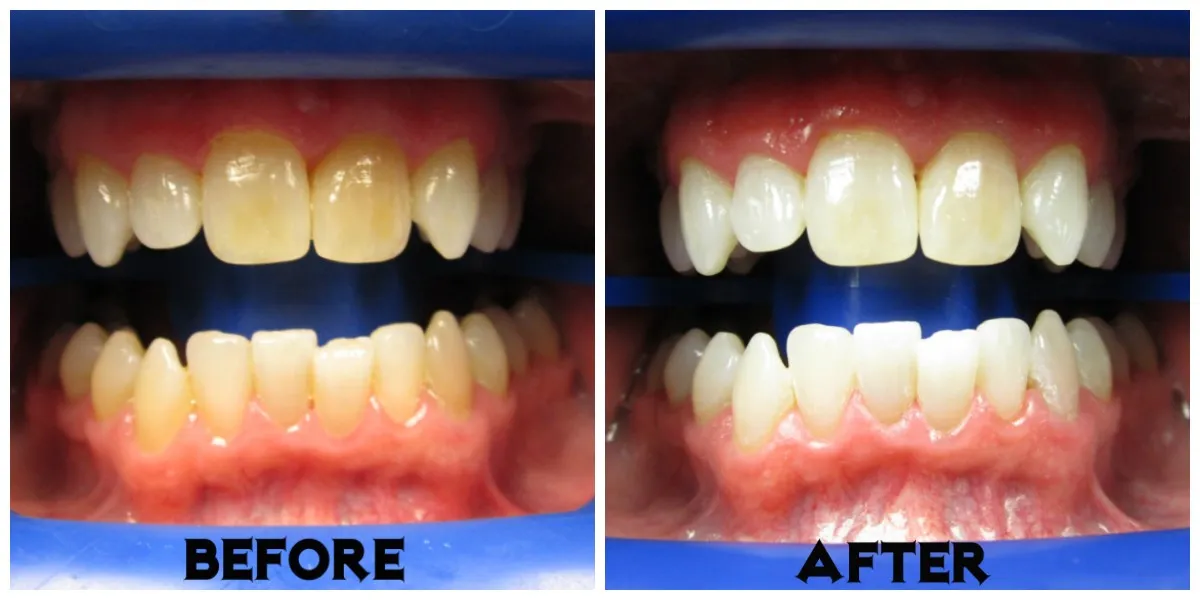
Whitening strips offer several benefits that contribute to their popularity. First and foremost, they are incredibly convenient. The strips are easy to apply and require minimal time commitment, fitting seamlessly into your daily routine. Secondly, they are relatively inexpensive compared to professional treatments, making them an accessible option for most budgets. Another significant benefit is the ease of use; no special equipment or skills are required. The strips adhere directly to your teeth, targeting the areas that need whitening. Moreover, many users report noticeable results within a few days of consistent use. Finally, whitening strips are widely available, allowing you to purchase them from various retail locations or online, making them a very convenient option for achieving a brighter smile.
How to Use Whitening Strips Effectively
For optimal results, start with clean teeth by brushing gently, then dry your teeth. Peel the strips from their backing and apply them to your teeth, following the instructions. Ensure the strips are properly aligned with the gum line to maximize coverage. Leave the strips on for the recommended time, usually 30 minutes to an hour, as indicated on the product packaging. Avoid eating, drinking, or smoking while the strips are in place. After the specified time, remove the strips and discard them. Rinse your mouth to remove any remaining gel. For best results, use the strips consistently as directed, typically once or twice a day for the duration recommended by the manufacturer. Avoid excessive use to minimize the risk of sensitivity. Regularly check your progress and discontinue use if you experience any severe discomfort or adverse effects.
Method 2 Whitening Toothpaste
Whitening toothpaste is a readily available and affordable option for those seeking a brighter smile. Unlike regular toothpaste, whitening toothpaste contains abrasive agents or chemical ingredients that help remove surface stains from your teeth. These toothpastes are designed to enhance the natural whiteness of your teeth by gently polishing the enamel and breaking down stain buildup. While whitening toothpaste can be a good addition to your oral hygiene routine, it’s important to understand its limitations. They are generally less effective than professional treatments or even other at-home methods, and they work primarily on surface stains rather than deep discoloration. Consistent use can help maintain the brightness of your teeth and prevent new stains from forming. However, it’s not a quick fix for significant discoloration.
How Whitening Toothpaste Works
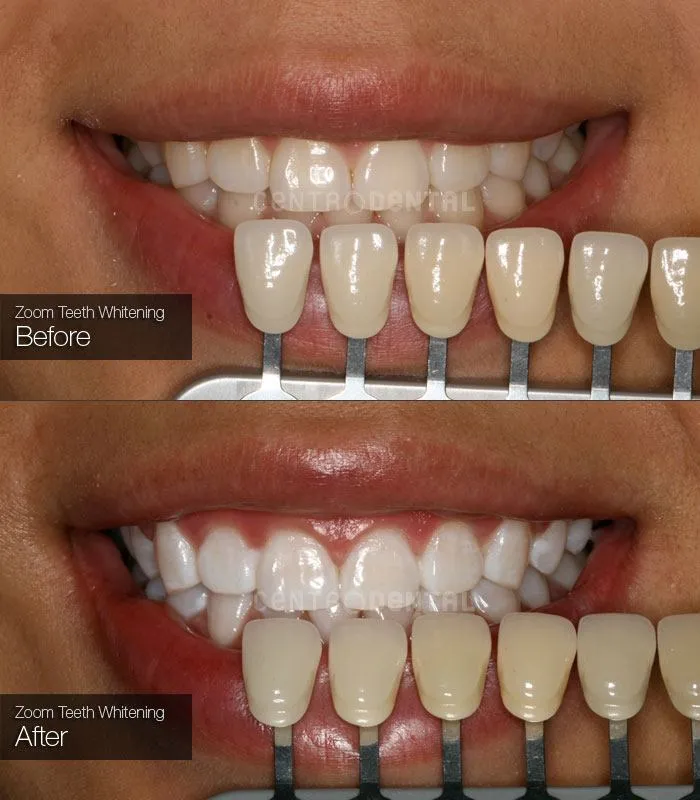
Whitening toothpastes employ different mechanisms to brighten your teeth. Some contain mild abrasives, such as hydrated silica or calcium carbonate, which gently scrub away surface stains. These abrasives act like micro-polishers, helping to remove food particles, plaque, and stains that dull your smile. Other whitening toothpastes contain chemical agents, such as hydrogen peroxide or baking soda, which have mild bleaching effects. These chemicals help to break down stains at a slightly deeper level. Most whitening toothpastes also include ingredients that help to prevent new stains from forming. It is important to note that, unlike professional whitening treatments, whitening toothpastes do not significantly change the intrinsic color of your teeth; instead, they primarily address surface stains and help to maintain your teeth’s natural brightness.
Choosing the Right Whitening Toothpaste
When selecting a whitening toothpaste, consider several factors. Look for products that contain effective stain-removing ingredients like hydrated silica or baking soda. Check for the American Dental Association (ADA) seal of approval, which indicates that the toothpaste has been tested for safety and effectiveness. Be mindful of the abrasiveness of the toothpaste. While mild abrasives are helpful, excessively abrasive toothpastes can damage enamel over time. Start with a toothpaste that has a lower Relative Dentin Abrasivity (RDA) value and gradually increase if needed, but always consult with your dentist first. If you have sensitive teeth, look for a toothpaste designed for sensitive teeth, as these often contain lower levels of abrasive agents. Finally, consider your personal preferences, such as taste and foam level, to ensure you enjoy using the toothpaste regularly for consistent results.
Method 3 DIY Whitening with Baking Soda and Hydrogen Peroxide
Combining baking soda and hydrogen peroxide is a popular DIY teeth whitening method that leverages the natural cleaning and bleaching properties of these ingredients. Baking soda is a mild abrasive that can help scrub away surface stains. Hydrogen peroxide is a mild bleaching agent that can help to lighten the color of your teeth. Many people choose this method due to its affordability and the convenience of using ingredients commonly found at home. However, it is essential to use this method with caution and to follow specific guidelines to minimize any potential risks. It’s crucial to understand that while this DIY approach can remove surface stains, it’s not as powerful as professional whitening treatments and may not be suitable for deep discoloration or serious stains.
Safety Precautions
Safety is paramount when using the baking soda and hydrogen peroxide method. Always use food-grade baking soda, which is less abrasive than other types. Use 3% hydrogen peroxide solution, which is readily available at most pharmacies. Avoid using a higher concentration, as it can damage your gums and enamel. Before starting, consult with your dentist, especially if you have sensitive teeth, gum disease, or any other dental issues. Perform a patch test by applying a small amount of the mixture to a small area of your teeth and gums to check for any adverse reactions. Do not use this method frequently; limit it to once or twice a week at most. Excessive use can lead to enamel erosion and increased tooth sensitivity. If you experience any irritation, pain, or unusual sensitivity, discontinue use immediately and consult your dentist.
Step-by-Step Guide
To use the baking soda and hydrogen peroxide method, begin by mixing one tablespoon of baking soda with two tablespoons of 3% hydrogen peroxide to create a paste. Apply a small amount of the paste to your toothbrush. Gently brush your teeth for about two minutes using a circular motion, ensuring you reach all surfaces. Avoid brushing too aggressively, as this can damage your enamel. After brushing, rinse your mouth thoroughly with water. Do not swallow any of the paste or rinse. You can follow this with your regular brushing routine using toothpaste. Remember to limit the frequency of this method to no more than twice a week to avoid any potential damage. For best results and to ensure safety, it is advisable to discuss this method with your dentist before beginning and to seek their professional advice.
Method 4 Whitening Trays
Whitening trays offer a more tailored approach to at-home teeth whitening. They are custom-made or pre-fabricated trays designed to fit over your teeth, ensuring that the whitening gel comes into close contact with the tooth surfaces. Custom trays are made by a dentist based on impressions of your teeth, providing a perfect fit and preventing the gel from leaking onto your gums. Pre-fabricated trays are available over-the-counter and are typically a more affordable option, though they may not fit as precisely as custom trays. Whitening trays generally use a lower concentration of hydrogen peroxide or carbamide peroxide gel compared to professional treatments. The effectiveness depends on the concentration of the whitening agent, the duration of use, and the frequency of applications. These trays offer a convenient and effective way to whiten your teeth at home.
Types of Whitening Trays
There are two main types of whitening trays custom and pre-fabricated. Custom whitening trays are created by a dentist. Your dentist takes impressions of your teeth and sends them to a lab, where the trays are made to precisely fit your mouth. This precise fit minimizes the chance of the whitening gel contacting your gums and causing irritation. Custom trays typically offer better results because of the close contact and more efficient distribution of the whitening agent. Pre-fabricated trays are readily available over-the-counter and come in a variety of shapes and sizes. These are generally more affordable, but they might not provide as snug a fit as custom trays. The effectiveness can vary depending on the fit and how well the tray covers the teeth. Pre-fabricated trays are convenient for individuals looking for a cost-effective option without professional assistance. The choice between the two depends on your budget, desired level of precision, and preferences.
How to Use Whitening Trays at Home
Using whitening trays at home requires following specific instructions to ensure safety and effectiveness. If you have custom trays, your dentist will provide detailed instructions on how to use them. First, brush and floss your teeth thoroughly to remove any food particles or debris. Apply a small amount of whitening gel, typically provided by your dentist or purchased separately, into the tray according to the product instructions. Carefully insert the tray into your mouth, ensuring it fits snugly over your teeth. Follow the recommended wear time, which can range from 30 minutes to several hours or overnight, depending on the concentration of the gel and the product instructions. Once the time is up, remove the tray and rinse your mouth thoroughly with water. Clean the tray with a soft toothbrush and rinse it with cold water. Avoid using hot water, as it can warp the tray. It’s essential to consult with your dentist to get advice and guidance for your individual needs.
Method 5 Natural Whitening Remedies
In addition to over-the-counter and professional treatments, various natural remedies have been touted as methods for teeth whitening. These natural approaches often involve ingredients readily available in your kitchen and are generally considered to be gentler options. While natural remedies may not deliver the same dramatic results as professional treatments, they can help remove surface stains and maintain the brightness of your teeth. It is important to approach these remedies with realistic expectations and to be aware that their effectiveness can vary widely. Always consult with your dentist before trying any new treatment, especially if you have sensitive teeth or any existing dental issues. The focus is to use natural ingredients to avoid harsh chemicals while still aiming for a brighter smile.
Oil Pulling with Coconut Oil
Oil pulling is an ancient Ayurvedic practice that involves swishing oil in your mouth for a certain period to remove bacteria, toxins, and plaque. Coconut oil is a popular choice due to its pleasant taste and purported health benefits. The lauric acid in coconut oil possesses antimicrobial properties that may help to reduce bacteria in the mouth, which can contribute to the build-up of plaque and tartar, leading to a brighter smile. To practice oil pulling, place one to two tablespoons of coconut oil in your mouth and swish it around for 15 to 20 minutes. Make sure the oil reaches all areas of your mouth, including between your teeth. After swishing, spit out the oil into the trash can, as it can clog your drains. Rinse your mouth with water and brush your teeth as usual. It is essential to note that, while oil pulling can contribute to oral hygiene, its teeth-whitening effects are primarily through the removal of plaque and bacteria, not through a direct bleaching action.
Using Strawberries for Whitening
Strawberries contain malic acid, a natural enzyme that can act as a mild stain remover. Some people believe that rubbing strawberries directly on the teeth can help to remove surface stains. To use this method, mash a fresh strawberry into a paste. Apply the paste to your teeth and leave it on for a few minutes. Then, rinse your mouth thoroughly and brush your teeth as usual. While strawberries are a natural fruit, and the malic acid may offer mild stain-removing benefits, the effectiveness of this method is often debated. There is limited scientific evidence to support the effectiveness of strawberries as a significant teeth-whitening agent. It is important to note that excessive use can potentially erode enamel because of the acidity of the fruit. Therefore, if you choose to use strawberries for teeth whitening, do so in moderation and always brush your teeth properly afterward to maintain dental hygiene.
Maintaining Your Whitened Smile
After successfully whitening your teeth, maintaining those results is a crucial step. Maintaining your white smile involves adopting specific habits and avoiding substances that can stain your teeth. Proper oral hygiene, including brushing and flossing regularly, is essential. Regularly scheduled dental check-ups and cleanings can help to remove surface stains and maintain your teeth’s brightness. Additionally, knowing what to avoid and adopting preventive measures can extend the life of your whitened smile. This requires a consistent effort to avoid factors that cause discoloration and practicing healthy habits. By focusing on these practices, you can preserve your investment and keep your smile radiant.
Tips for a Long-Lasting Result
To extend the life of your teeth-whitening results, establish a solid oral hygiene routine. Brush your teeth at least twice a day with fluoride toothpaste and floss daily to remove plaque and food particles. Consider using a whitening toothpaste to help maintain the brightness of your teeth. Regular dental check-ups and professional cleanings are essential. Your dentist can identify and address any potential problems early, helping to maintain your white smile. Use a straw when drinking stain-causing beverages like coffee, tea, and cola, as this can help to minimize direct contact with your teeth. Chew sugar-free gum to stimulate saliva production, which can help wash away food particles and neutralize acids. Stay hydrated by drinking plenty of water throughout the day, which helps keep your mouth clean.
Avoiding Stain-Causing Foods and Drinks
Certain foods and drinks are notorious for staining teeth and can quickly diminish the results of your whitening efforts. Coffee and tea contain tannins, which can stain the enamel, leading to discoloration. Red wine is another culprit due to its deep color and tannins. Dark-colored sodas and sports drinks can also contribute to staining. Foods like berries, especially blueberries, blackberries, and raspberries, can leave stains on your teeth. Curry and other heavily pigmented spices can also cause discoloration. The key is to consume these items in moderation and practice preventive measures. If you consume stain-causing foods or drinks, rinse your mouth with water afterward or brush your teeth shortly after consumption. Regular and thorough brushing and flossing, coupled with professional dental cleanings, will go a long way in keeping your smile bright and your teeth healthy.
