Top 5 Teeth Whitening Picture Editors
In today’s digital age, achieving a picture-perfect smile is easier than ever. With the help of teeth whitening picture editors, you can enhance your photos and instantly brighten your teeth. This article explores the top 5 picture editors available, offering detailed insights into their features, pros, cons, and how to use them effectively. Whether you’re looking to touch up a selfie or refine a professional portrait, these tools provide a convenient and accessible solution for a dazzling smile. We’ll delve into what makes each editor stand out, so you can choose the best fit for your needs and achieve the smile you’ve always wanted. Let’s explore the exciting world of teeth whitening picture editors and discover how they can transform your images.
Understanding Teeth Whitening Picture Editors
Teeth whitening picture editors are digital tools that allow you to adjust the color and appearance of teeth in photographs. These editors use various technologies, such as color correction and selective adjustments, to make teeth appear whiter and brighter. They’re designed for both amateur and professional use, offering a user-friendly interface and a range of features to enhance your photos. These tools go beyond simple brightness adjustments; they offer sophisticated options to target specific areas of the teeth and create a natural-looking effect. By understanding how these editors work, you can take control of your images and achieve the perfect smile in every shot. The convenience and accessibility of these tools have revolutionized how we perceive and present ourselves in the digital world.
How Picture Editors Work for Teeth Whitening

Teeth whitening picture editors utilize sophisticated algorithms and tools to modify the color of teeth in an image. The core functionality involves color correction, where the editor adjusts the yellow or discolored tones to achieve a whiter appearance. Many editors include features like selective adjustments, which allow you to target specific areas of the teeth, ensuring a natural and even whitening effect. Some editors also offer tools to remove blemishes or imperfections, further enhancing the overall look. These editors typically provide an intuitive interface with sliders, brushes, and masking tools, making it easy for users to control the level of whitening and fine-tune the results. By understanding the underlying technology, you can leverage the full potential of these editors and create stunning, professional-looking results.
Key Features to Look For
When choosing a teeth whitening picture editor, consider several key features to ensure you get the best results. Look for tools that offer precise color correction and allow for selective adjustments, so you can control the whitening process. User-friendly interfaces with intuitive controls, such as sliders and brushes, are essential for ease of use. The ability to preview changes in real time helps you visualize the final result and make necessary adjustments. Advanced features, like blemish removal and the ability to adjust the color of the gums, can further enhance the overall appearance of your smile. Other features to consider include the ability to save your work, various export options, and compatibility with different image formats. Selecting an editor with these features will help you achieve a natural and professional-looking teeth whitening effect.
The Best Teeth Whitening Picture Editors
Selecting the best teeth whitening picture editor depends on your specific needs and preferences. Here’s a rundown of five top picks, each offering unique features and advantages. We’ll explore what makes each one stand out, helping you choose the right tool for your photo editing needs. These editors are designed to cater to various skill levels, from beginners to professional photographers, offering a range of options for enhancing your smile. Consider factors like ease of use, advanced features, and overall performance to determine the best fit for you. Let’s dive into the details of these top contenders and find the perfect editor to achieve your desired results.
Editor 1 Overview & Features

Editor 1 stands out with its user-friendly interface and powerful features. This editor provides an intuitive experience, making it ideal for beginners while still offering advanced tools for professional results. Key features include precise color correction, selective adjustment brushes, and real-time preview capabilities. Its design emphasizes simplicity, allowing users to effortlessly enhance the appearance of their teeth. Editor 1 is perfect for quickly brightening teeth and achieving a natural-looking smile without a steep learning curve. This editor is an excellent choice for those seeking ease of use and efficiency, providing a seamless and enjoyable photo editing experience.
Pros and Cons of Editor 1
The pros of Editor 1 include its simple and intuitive interface, making it easy for anyone to use. It offers excellent color correction tools and produces natural-looking results. The real-time preview feature allows for immediate adjustments. However, some cons may include a limited number of advanced features compared to more complex editors, and it may not be ideal for highly detailed or complex editing tasks. While perfect for basic teeth whitening, professional photographers might find it lacks some of the precision they need for highly intricate enhancements. Despite these limitations, Editor 1 remains an excellent choice for everyday users who want quick and effective teeth whitening.
Editor 2 Overview & Features
Editor 2 is known for its advanced editing capabilities, targeting professionals and users who require detailed control over their image enhancements. This editor features sophisticated tools for color correction, selective masking, and fine-tuning of teeth color. Its interface offers greater precision, allowing users to make subtle adjustments to achieve a flawless result. The advanced features include blemish removal tools, gum color adjustment, and various export options. Editor 2 is ideal for those who seek a professional-grade solution, offering the flexibility to create stunning and realistic teeth whitening effects. Its powerful performance makes it a top choice for complex photo editing tasks.
Pros and Cons of Editor 2

Editor 2’s pros include its extensive range of advanced features and highly customizable tools. Users can achieve a high level of precision and create incredibly natural-looking results. The support for complex editing tasks is a significant advantage. However, Editor 2 has a steeper learning curve compared to simpler editors, making it less suitable for beginners. The advanced tools and features can be overwhelming at first, requiring time to master. Furthermore, the cost can be higher, depending on the subscription model or one-time purchase price. Despite these factors, Editor 2 remains a top choice for professional photographers and users who demand the best in photo editing technology.
Editor 3 Overview & Features
Editor 3 is known for its innovative approach to teeth whitening, using AI-powered features to simplify the editing process. It offers intelligent color correction, automatic teeth detection, and one-click whitening options. Its AI algorithms analyze the image and suggest optimal enhancements, saving time and effort. The user interface is straightforward, making it accessible to both beginners and experienced users. Editor 3 also includes advanced features like teeth reshaping and virtual braces removal. For those looking for an easy and efficient solution with excellent results, Editor 3 is a perfect fit. The focus on automation streamlines the editing workflow.
Pros and Cons of Editor 3
The pros of Editor 3 include its ease of use, thanks to AI-powered features that automate many editing steps. The one-click whitening options and automatic teeth detection greatly reduce the time and effort required. It produces excellent results, and its user-friendly interface makes it accessible for everyone. Some cons include the potential for less control over the editing process compared to manual tools. The AI algorithms, while efficient, may not always produce the exact results a user envisions. Additionally, the reliance on AI may sometimes lead to unexpected outcomes if the image quality is poor. Nonetheless, Editor 3 is an excellent option for those who want quick, high-quality teeth whitening.
Editor 4 Overview & Features

Editor 4 is a versatile editor that caters to users across multiple platforms, including mobile and desktop. It features comprehensive tools for teeth whitening, including precision brushes, color adjustment sliders, and real-time previews. This editor offers a seamless experience across different devices, making it convenient for editing on the go. The mobile version provides portability, while the desktop version offers more detailed control. Its features include selective adjustments, blemish removal, and a wide range of export options. Editor 4 is perfect for users who need a flexible solution that works well on any device and provides consistent results. The multi-platform compatibility is a key selling point.
Pros and Cons of Editor 4
The pros of Editor 4 are its cross-platform compatibility, ensuring that users can edit their photos from any device. The interface is consistent across platforms, making it easy to switch between mobile and desktop. The toolset is comprehensive, and the real-time previews aid in quick adjustments. The cons may include potential differences in feature sets across platforms; some advanced tools might be limited on mobile. While convenient, users may sometimes find the interface less intuitive compared to a dedicated desktop editor. However, these limitations are minor compared to the flexibility and convenience that Editor 4 provides for users who need to edit on various devices. The ease of use and consistent results make it a great choice.
Editor 5 Overview & Features
Editor 5 is a cost-effective option, offering powerful teeth whitening features at an affordable price. This editor is designed to provide excellent value, making it accessible to budget-conscious users. It features precise color correction, user-friendly sliders, and various enhancement tools. Editor 5 may also include batch processing capabilities, allowing users to edit multiple photos simultaneously, saving time and effort. It can provide excellent results for users who need to whiten teeth without a high price tag. If you are looking for a budget-friendly yet efficient solution for your teeth whitening needs, Editor 5 offers a good balance of price and performance. The cost-effectiveness does not compromise on features; it provides excellent results at a reasonable price.
Pros and Cons of Editor 5

The pros of Editor 5 include its affordability and ease of use, making it accessible to everyone. The essential features are well-executed, producing natural-looking teeth whitening results. The batch processing capability is a significant time-saver. The cons may include a limited number of advanced features compared to premium editors, and the user interface may not be as refined. Some users might find that the performance is not as robust as in higher-end software, especially with complex edits. Nevertheless, Editor 5 is a great choice for budget-conscious users who prioritize functionality and value. It offers a balance between cost and performance that makes it a solid choice for casual users.
How to Use a Teeth Whitening Picture Editor
Using a teeth whitening picture editor is a straightforward process, though it can vary slightly depending on the specific tool. Begin by importing the photo into the editor. Most editors allow you to select specific tools to whiten your teeth. Start by using color correction to address yellowing. Use selective adjustment tools like brushes or masks to target the teeth, and avoid affecting the gums or surrounding areas. Fine-tune the adjustments with sliders or other controls to achieve the desired level of whiteness. Use the real-time preview feature to see the results instantly and make necessary tweaks. Save your work and export the image in your desired format. By following these steps, you can easily enhance your smile and achieve a brighter, more appealing look.
Step-by-Step Guide to Whitening Teeth
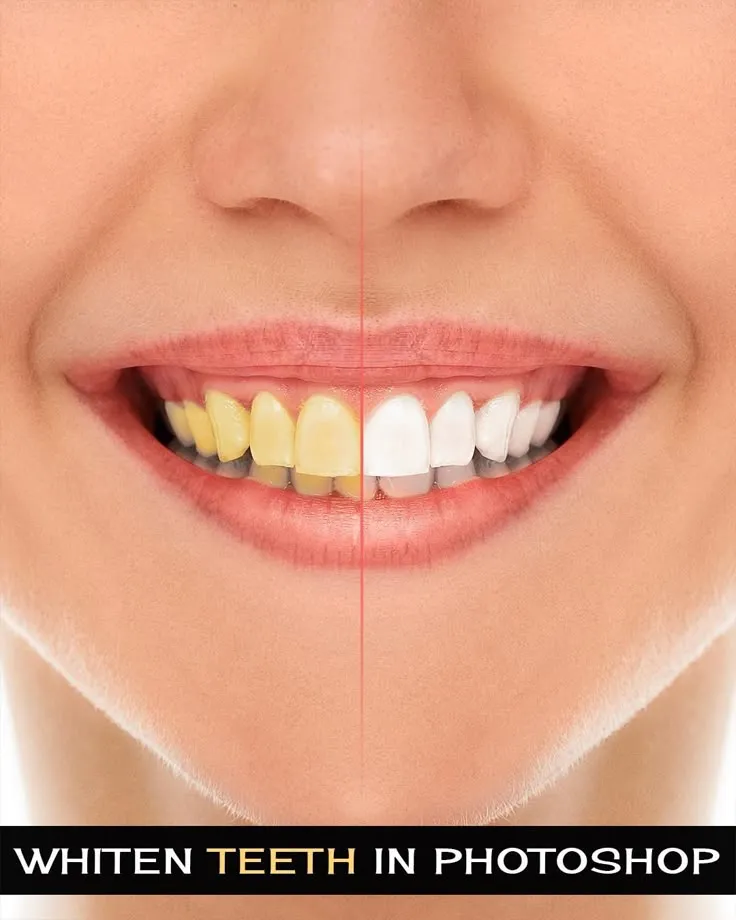
The process of whitening teeth in a picture editor typically involves a few simple steps. Start by opening the image in the editor. Select the teeth whitening tool, usually found in the color correction or enhancement section. Use a selection tool to isolate the teeth, which prevents adjustments from affecting other parts of the image. Apply the whitening effect gradually, using sliders or other controls to adjust the color. Use the real-time preview to see how the changes affect the image. For natural results, avoid over-whitening, which can make the teeth appear artificial. Once satisfied, save your work. Review the before and after to ensure you are happy with the changes. With patience and practice, you can achieve a natural-looking smile enhancement.
Tips and Tricks for Natural-Looking Results

Achieving a natural-looking teeth whitening effect requires a few key techniques. Avoid over-whitening by making subtle adjustments. Use selective adjustment tools to target the teeth only, which helps avoid the artificial look. Pay attention to the surrounding features, such as the gums and skin tone, to ensure a harmonious result. Adjust the saturation and contrast, so the teeth blend well with the rest of the image. Use the editor’s preview feature and compare the before-and-after views to ensure the changes are realistic. By following these tips, you can enhance your smile and create a natural, confident look. The goal is to make it look like you had your teeth whitened naturally. See how easy it is with a few careful adjustments.
Things to Avoid in a Teeth Whitening Editor
To ensure the best results, avoid certain common mistakes in a teeth whitening editor. Over-whitening is one of the biggest pitfalls, leading to an artificial appearance. Also, avoid selecting too much of the surrounding areas, which may change the color of the gums and skin tone unnaturally. Be careful not to apply the whitening effect unevenly; this can create streaks or unnatural variations in color. Avoid using the editor to correct issues not directly related to teeth whitening, such as removing wrinkles or blemishes, as that goes beyond the scope of this tool. Lastly, skip the temptation to perform drastic changes in one go; gradual, subtle enhancements deliver the most natural look.
Common Mistakes to Avoid
Avoid making common mistakes when using a teeth whitening editor. One is overdoing the effect, resulting in a fake and unnatural look. Another mistake is not taking the time to isolate the teeth, leading to unintended color shifts. Neglecting to preview the changes in real-time can also cause you to lose sight of the natural look. Many people also forget to consider the overall image balance, as their focus is only on the teeth, and they forget to match the brightness of the teeth with the rest of the image. By being aware of these mistakes and avoiding them, you can ensure your results look realistic and appealing. Attention to detail is key to achieving the best results.
Maintaining Your Brightened Smile
To maintain your brightened smile, a multi-faceted approach is required. Regular oral hygiene practices are essential, including brushing and flossing to remove plaque and prevent staining. Consider using whitening toothpaste, which can help remove surface stains. Avoid foods and beverages that stain teeth, such as coffee, tea, and red wine, or consume them in moderation. Professional teeth cleaning can also help keep your teeth looking their best. Regular dental checkups can detect any problems early. By implementing these habits, you can keep your enhanced smile looking fantastic for a long time.
Alternatives to Picture Editors
While teeth whitening picture editors are useful, other methods can also improve your smile. Professional teeth whitening is one option, where a dentist uses powerful bleaching agents to whiten teeth. Over-the-counter whitening products, such as strips and trays, can also offer some effect. Consider veneers for those who want a more dramatic change, especially if you have significant damage or discoloration. It’s important to consult with a dentist to determine the most suitable option for your situation. Each alternative has its advantages and disadvantages, so consider the benefits of your smile. Also, be sure to take into account any potential risks.
Other Methods for Teeth Whitening
Beyond professional and over-the-counter options, several other teeth whitening methods can be used. Homemade remedies are one way to help whiten teeth, such as using baking soda or charcoal, although these can be abrasive. Whitening toothpastes and mouthwashes can help remove surface stains. The right methods will help maintain your brighter smile. Remember to check with a dentist before trying alternative methods. It is best to choose the right method that suits your needs. By using these methods in combination, you can maximize your chances of a brighter smile.
Conclusion
Teeth whitening picture editors are valuable tools for enhancing your smile in photos. By choosing the right editor and following the tips outlined, you can achieve natural-looking results and boost your confidence. Whether you opt for a user-friendly editor or one with advanced features, understanding the tools and techniques is key to success. Remember to avoid common mistakes and maintain your brightened smile through good oral hygiene. With the right approach, you can transform your images and enjoy a more radiant smile. Take the time to find the best option for you. The end result is a perfect smile.