Ingredients You’ll Need
Embarking on the journey of creating your own whitening strips at home can be a rewarding experience, providing a cost-effective alternative to commercial products. Before you start, gather all the necessary ingredients to ensure a smooth and successful process. You’ll primarily need baking soda, a common household item known for its gentle abrasive properties and ability to remove surface stains. Next, hydrogen peroxide, a mild antiseptic, and oxidizing agent, will act as the primary whitening agent. Make sure to have a small bowl for mixing, a spoon or spatula for stirring, and some way to shape your strips such as parchment paper or plastic wrap. Additionally, you may want a mirror and a timer to monitor your progress. This straightforward approach allows you to customize the ingredients and control the concentration of whitening agents, ensuring a tailored solution for your teeth whitening needs. It is also a good practice to have some water and a soft toothbrush on hand to rinse after application.
Baking Soda and Hydrogen Peroxide
The combination of baking soda and hydrogen peroxide is a potent yet gentle duo for teeth whitening. Baking soda, a mild abrasive, helps to scrub away surface stains caused by coffee, tea, and other foods. Hydrogen peroxide, on the other hand, penetrates the enamel and whitens teeth from within by breaking down stain molecules. The effectiveness of this combination lies in the synergy between these two ingredients. You’ll typically use a ratio that balances efficacy with safety. For example, you might start with a mixture of one tablespoon of baking soda and two tablespoons of hydrogen peroxide. Adjust the amount based on your needs and comfort level. Remember to use a fresh bottle of hydrogen peroxide to ensure its potency. When combined, these ingredients create a paste that is easy to apply and effective in brightening your smile. Regular use can lead to noticeable results, but it’s essential to use this method with caution and moderation.
Mixing the Ingredients

The key to effective homemade whitening strips is mixing the ingredients correctly. Start by ensuring your bowl is clean and dry. Measure the baking soda and hydrogen peroxide into the bowl using a spoon or measuring device. Begin by slowly adding the hydrogen peroxide to the baking soda. Mix gently with a spoon or spatula to create a paste-like consistency. The mixture should not be too runny or too thick; it should be easy to spread but not drip. If the mixture is too thick, add a few drops of hydrogen peroxide until you achieve the desired consistency. If it’s too runny, add a bit more baking soda. The consistency is crucial for ensuring the whitening strips adhere properly to your teeth. Take your time, and mix the ingredients thoroughly, ensuring there are no lumps of baking soda. A well-mixed paste will ensure even application and maximize the whitening effect. Always mix fresh before each use to maintain the potency of the hydrogen peroxide.
Creating the Strip Shape
Creating the shape of your DIY whitening strips is crucial for proper application and effectiveness. There are a few methods you can use. One popular method involves using parchment paper or plastic wrap. Lay a sheet of parchment paper or plastic wrap on a flat surface. Using a spoon, spread a thin, even layer of the baking soda and hydrogen peroxide paste onto the paper. The shape should resemble the size and shape of your teeth, covering the visible portions. For better coverage, consider making two separate strips, one for the upper teeth and one for the lower teeth. Alternatively, you can use a mold or a pre-made dental tray to shape the paste directly. If you are using this approach, ensure the shape is not too thick, as this could make it difficult to place in your mouth. Ensure the shape covers all the visible teeth surfaces. Allow the strips to set slightly before application, this will make the application easier, and help to prevent the paste from dissolving too quickly in your mouth.
Application and Duration
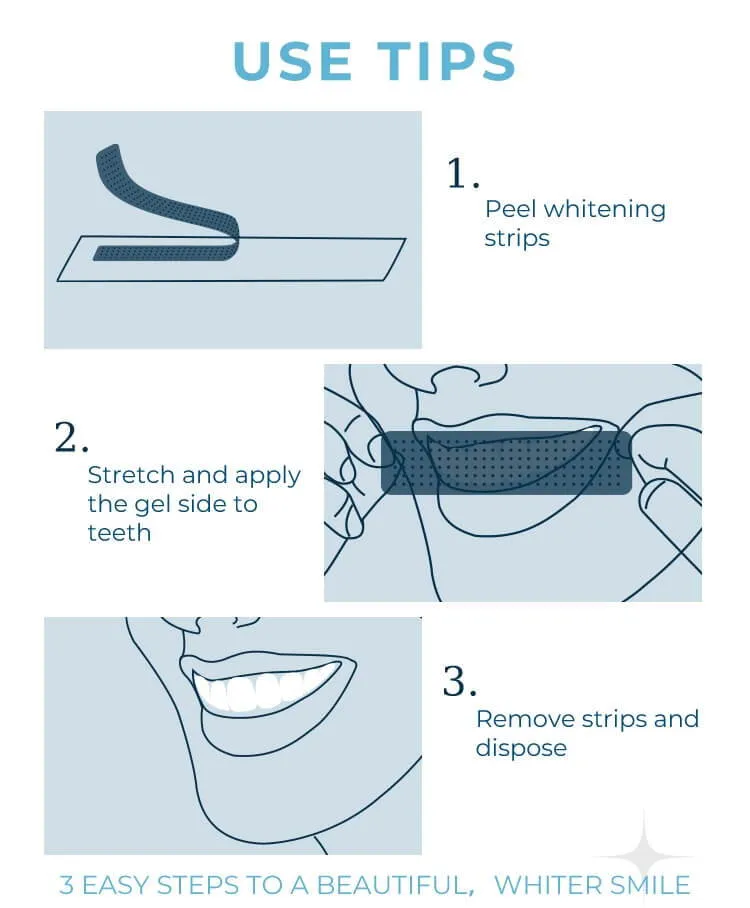
Proper application and duration are key to achieving the desired teeth-whitening results. Carefully peel the strips from the parchment paper or plastic wrap, or remove them from the mold. Gently place the strips onto your teeth, ensuring they cover the front surface of your teeth. Gently press the strips onto your teeth, adjusting them to fit snugly and evenly. The duration of the application is important for achieving the desired effect. Most recommend leaving the strips on for 10–15 minutes. Monitor your teeth closely to ensure you don’t experience any discomfort or sensitivity. If you feel excessive sensitivity, remove the strips immediately. After the allotted time, remove the strips carefully and dispose of them. Rinse your mouth thoroughly with water to remove any remaining paste residue. Avoid swallowing the mixture and make sure to rinse your toothbrush as well. For best results, repeat the process up to once or twice a week, but avoid overusing this method to prevent potential sensitivity.
How to Apply the Strips

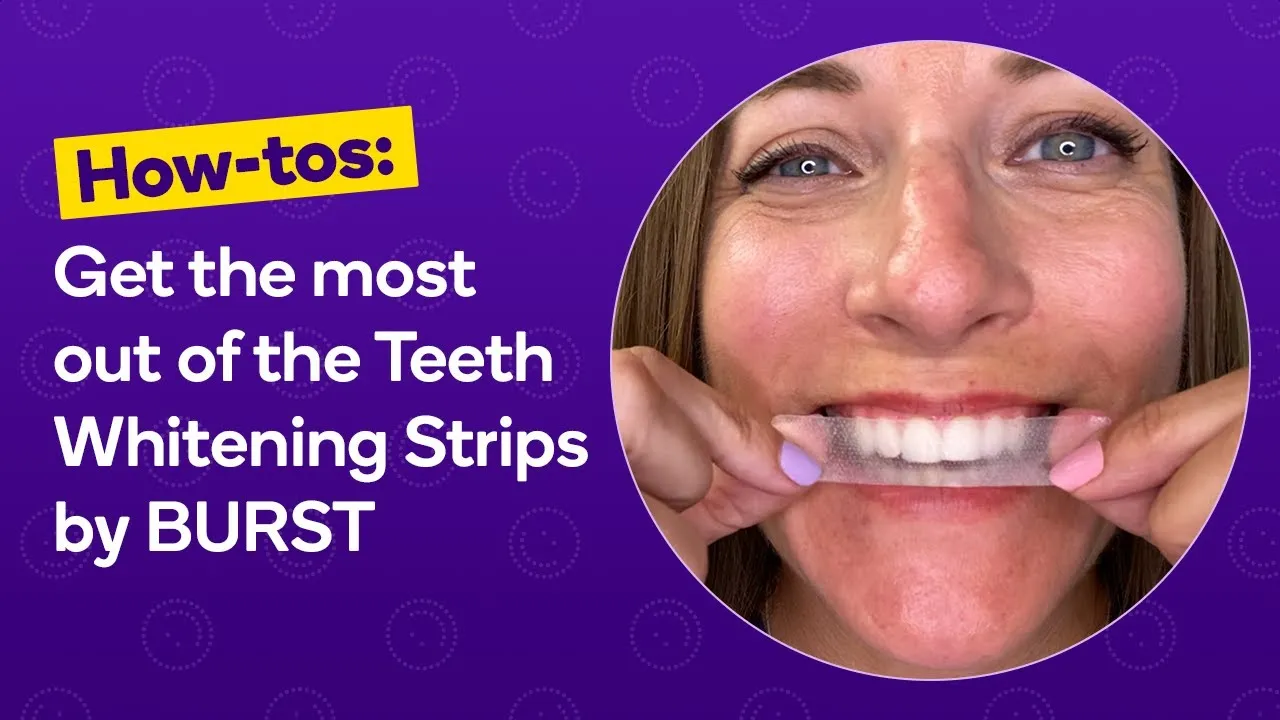
Applying homemade whitening strips requires care and precision to ensure effectiveness and safety. Ensure your teeth are clean and dry before applying the strips. You can gently dry your teeth with a clean tissue, ensuring that there is no excess saliva. After you have created your strips and are ready to apply, begin by carefully positioning the strip onto your upper teeth, pressing gently but firmly to ensure it adheres to the teeth’s surface. Then, apply the second strip to your lower teeth. If you are using two strips, make sure the strips cover the front surface of your teeth. Make sure the strips are well aligned and not folded over or touching your gums excessively, to minimize irritation. Once the strips are in place, avoid eating, drinking, or talking to prevent them from dislodging. Keep your mouth slightly open to help with salivation but keep the strips in place. Remember to follow the recommended application time and remove the strips carefully and rinse your mouth thoroughly once the time is up.
Whitening Strips DIY Safety and Precautions
While making your own whitening strips can be a cost-effective alternative, it’s important to prioritize safety and take necessary precautions. Hydrogen peroxide is the active ingredient that whitens teeth, but using it improperly can lead to complications. Never use a higher concentration of hydrogen peroxide than recommended, as this can cause irritation and damage to the gums and teeth. If you experience any pain, increased sensitivity, or gum irritation, discontinue use immediately and consult a dentist. Avoid swallowing the mixture, and rinse your mouth thoroughly after each application. Those with sensitive teeth or existing dental work, like fillings or crowns, should exercise extra caution or consult their dentist before trying DIY whitening strips. Overuse can lead to enamel erosion, causing long-term damage. Always follow the recommended application time and frequency. Keeping a vigilant eye on your dental health and consulting a professional when in doubt are essential steps for a safe and effective whitening experience.
Potential Side Effects
DIY teeth whitening strips, while effective for some, come with potential side effects that you should be aware of. The most common side effect is tooth sensitivity. This happens because the whitening agents can penetrate the enamel and irritate the nerves in the teeth. Some users may experience gum irritation, which can manifest as redness, swelling, or tenderness along the gum line. This is often due to contact with the whitening solution. In rare cases, some individuals may experience mild enamel erosion if the process is overused or if the concentration of hydrogen peroxide is too high. Changes in tooth shade and uneven whitening can also occur, especially if the strips are not applied evenly. If any of these side effects occur, it is best to reduce the frequency of use or discontinue use completely. For persistent or severe side effects, seek advice from a dentist.
Alternatives to Whitening Strips

If DIY whitening strips aren’t the right fit for you, or if you’re looking for alternatives, there are many options to consider. Over-the-counter whitening products, such as whitening toothpastes, mouthwashes, and gels, can offer a gentler approach to improving the brightness of your teeth. These products typically contain lower concentrations of whitening agents and are designed for daily use. Another alternative is professional teeth whitening performed by a dentist. Professional whitening treatments are stronger and can produce more dramatic results in a shorter amount of time. Your dentist can also provide custom-fitted trays for at-home whitening. For less invasive options, you can improve the appearance of your teeth by maintaining good oral hygiene, which involves regular brushing, flossing, and dental checkups. Changing your diet to include fewer staining foods and drinks such as coffee and tea, can also help maintain a whiter smile. Always consult your dentist for personalized advice.
